10,A- Install WHMCS module
Go to the AutoVM admin area and create a user with the Admin type for the WHMCS API service. Then go to the users’ list and copy the created user token.
Download and upload the WHMCS module file from AutoVM LAB, and extract the module file on the WHMCS root directory.
Go to WHMCS/includes/hooks/autovm directory and copy config.php.examle to config.php.
Open the config.php file, change the domain and replace the created token on the AutoVM admin area.
Attention: Be careful about HTTP or HTTPS.
go to WHMCS admin area > System Settings > Addon module, and Enable AutoVM options.
Go to the WHMCS admin area > System Settings > Configurable options and create a product group, and enter the AutoVM as the group name.
Then, on the configurable options, create an option with the exact following name:
template|Template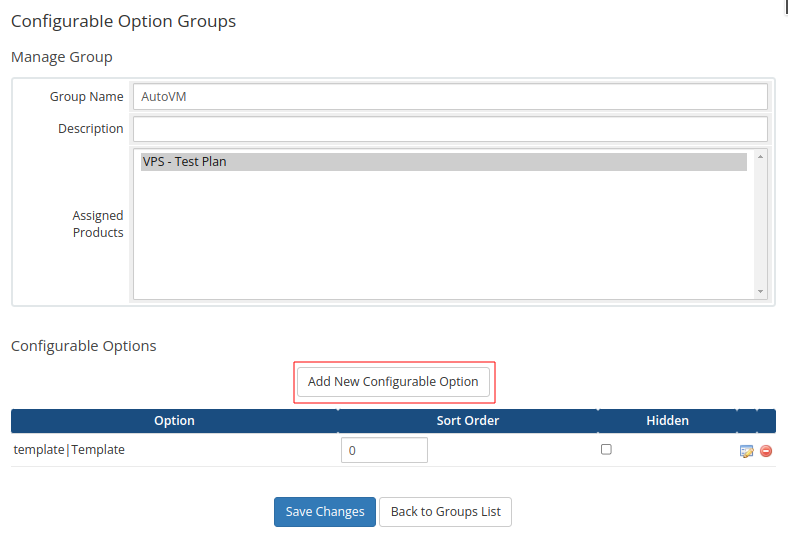
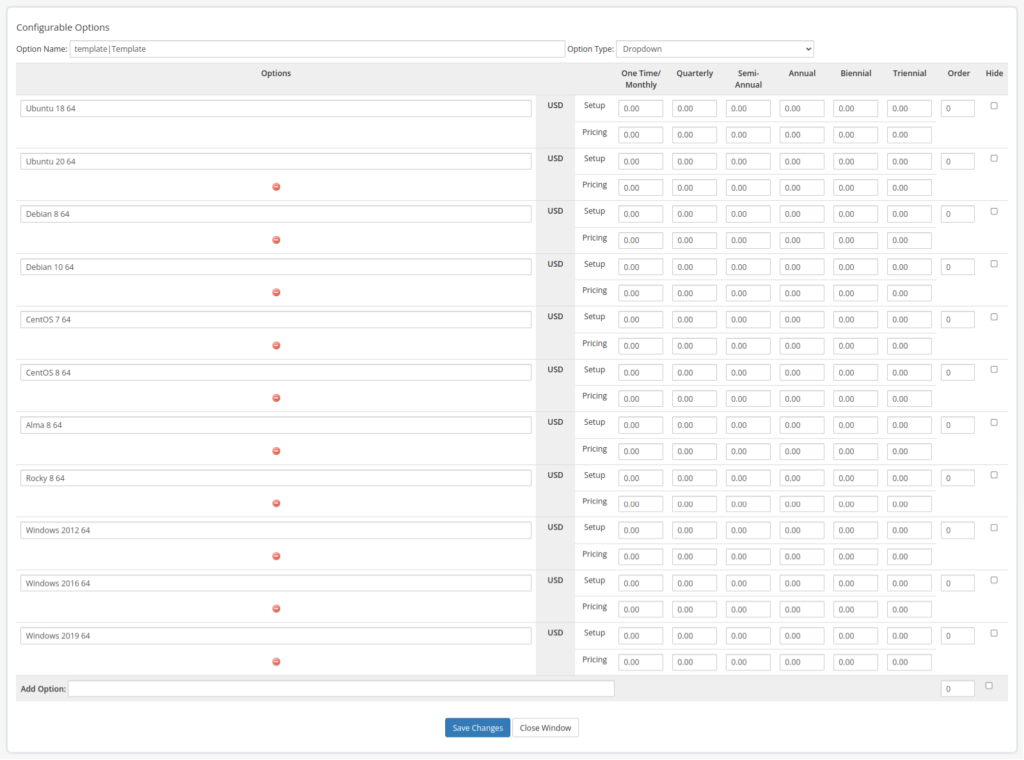
Add your Operating systems exact the following words:
Ubuntu 18 64
Ubuntu 20 64
Ubuntu 22 64
Debian 8 64
Debian 10 64
Debian 11 64
CentOS 7 64
CentOS 8 64
Alma 8 64
Alma 9 64
Rocky 8 64
Rocky 9 64
FreeBSD 13
Windows 2012 64
Windows 2016 64
Windows 2019 64
Windows 2022 64
Go to Products/Services and create a product.
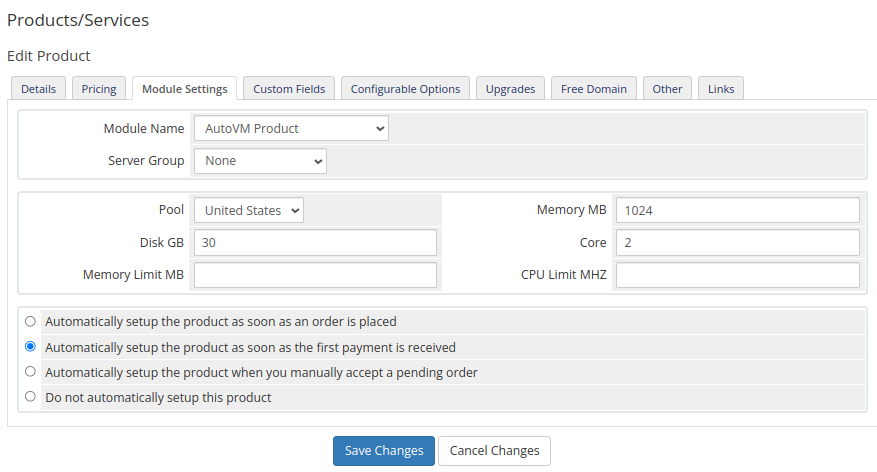
Go to Module settings, choose the AutoVM Product option, and enter the product resources.
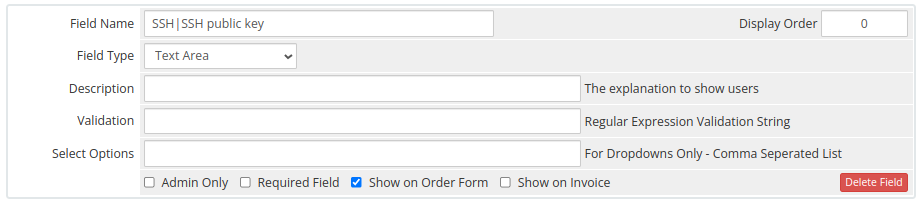
Then, go to custom fields and create a custom field called “SSH|SSH public key” change the “Field type” to “Text area” and enable the “Show on Order Form” option.
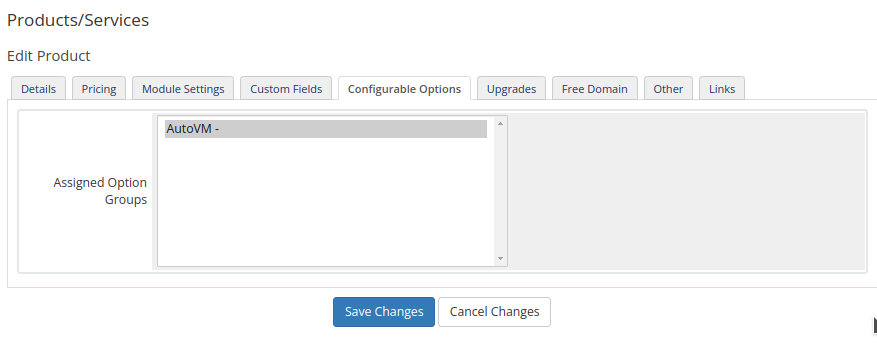
Finally, go to configurable options and choose “AutoVM”.