
13,B- Extra Configurations in WISECP
In Section 10,B- Install WISECP module we added extra services like extra Memory or Extra CPU Core as addons, here we give more details for this section. First part is about addons, then the second part is all about requirements
PART ONE: Addons
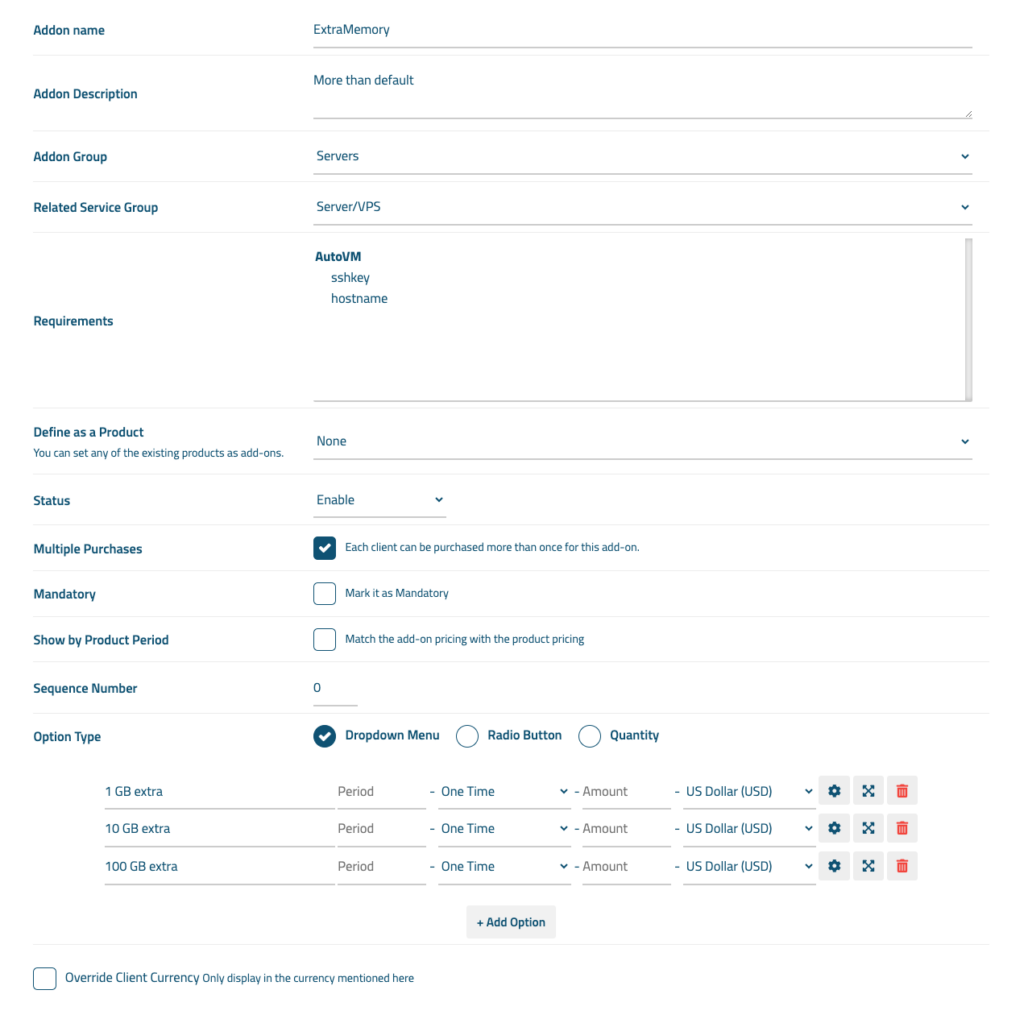
1- Extra Memory
Looking at the bellow image, it is clear that the name of addons is “ExtraMemory” which is Optional and it is in Service Group of “Server/VPS”. Looking at the bottom of image, it can be seen that Option Type are in (1 GB extra) format, meaning that you should use a number in scale of GB and the number should be integer, other format like “1GB” without space, or “1 gb” with lowercase words can cause errors.
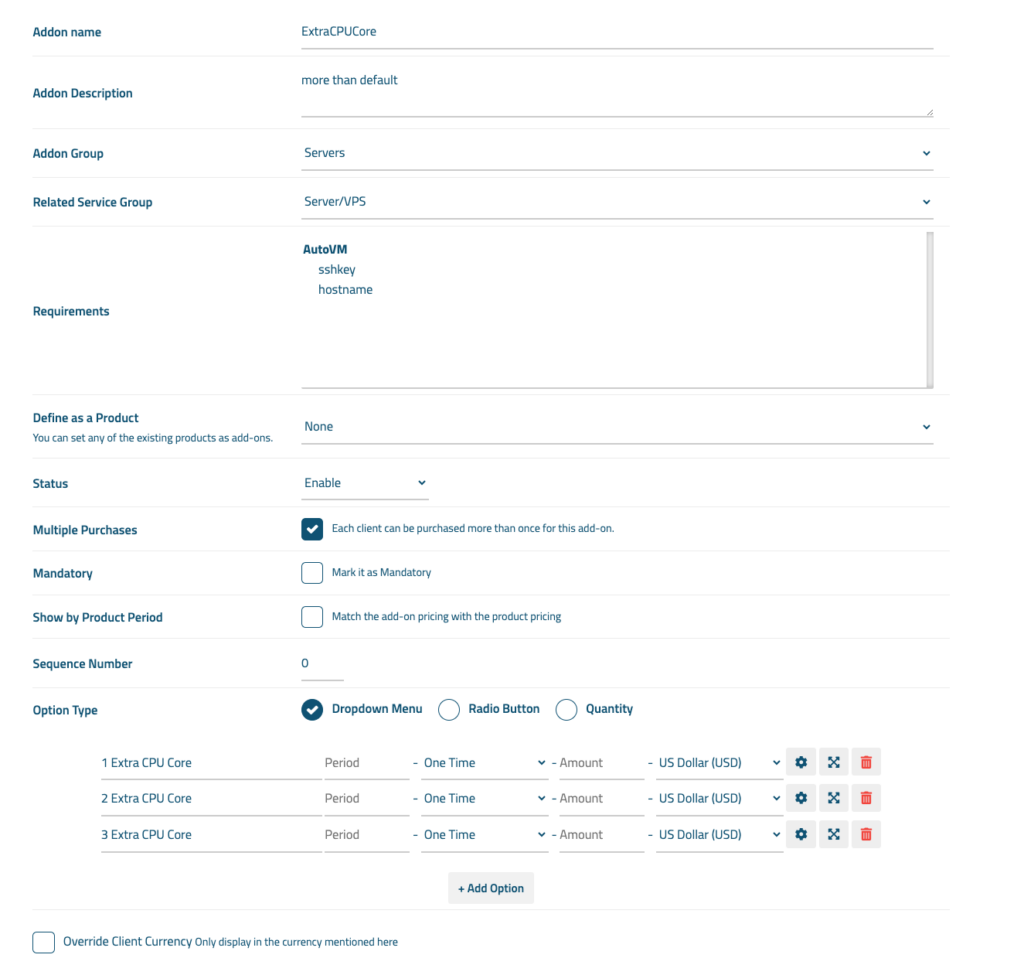
2- Extra CPU Core
As well as ExtraMemory addons, Looking at the bellow image, it is clear that the name of addons is “ExtraCPUCore” which is Optional and it is in Service Group of “Server/VPS”. Looking at the bottom of image, it can be seen that Option Type are in (1 Extra CPU Core) format, meaning that you should use a number that is integer then the word “Extra” must be used. here you can use any integer number like 1, 2, 3 but no float number like 1.5. Also, the word “Extra” is essential to be used in this format without changing the Lower or Uppercase
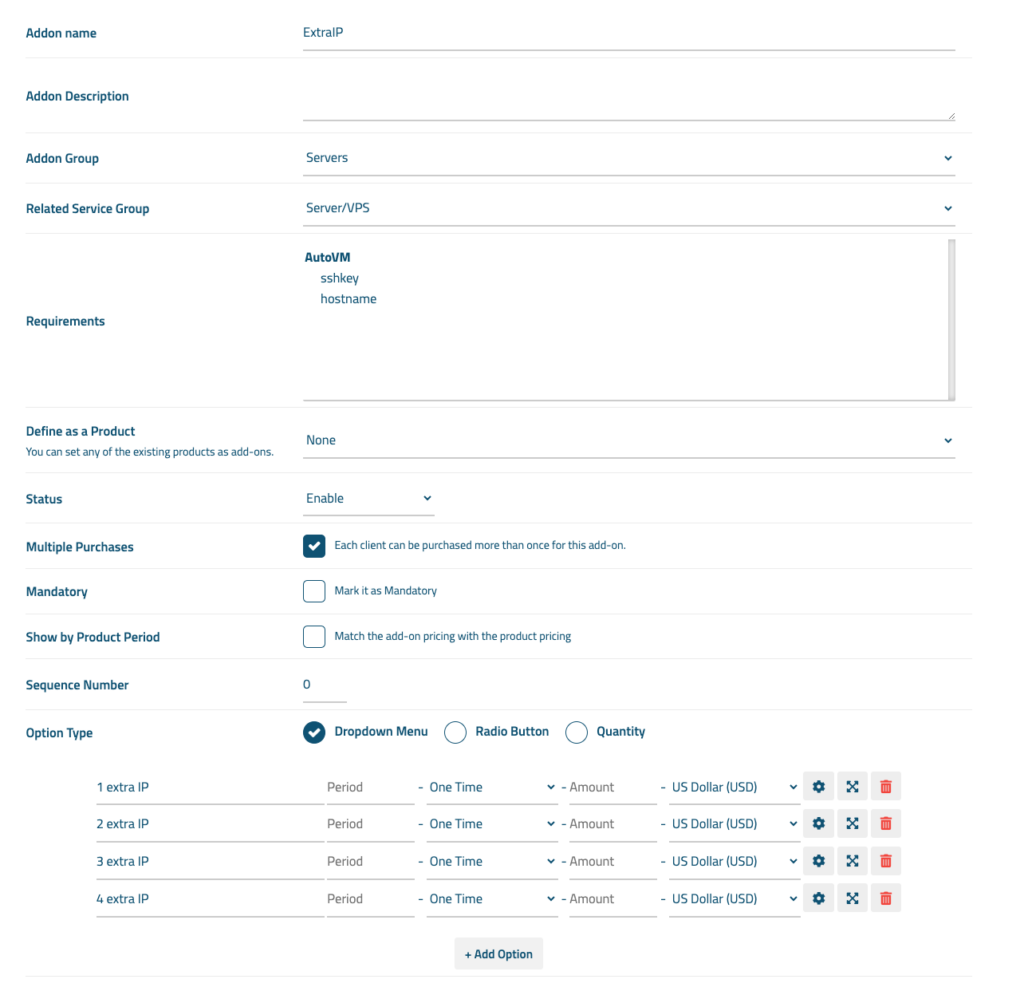
3- ExtraIP
Addon name —> ExtraIP
Other parameters like before use same parameters as ExtraMemory, just change the options like this:
- First Option —> 1 extra IP
- Second Option —> 4 extra IP
- Third Option —> 12 extra IP
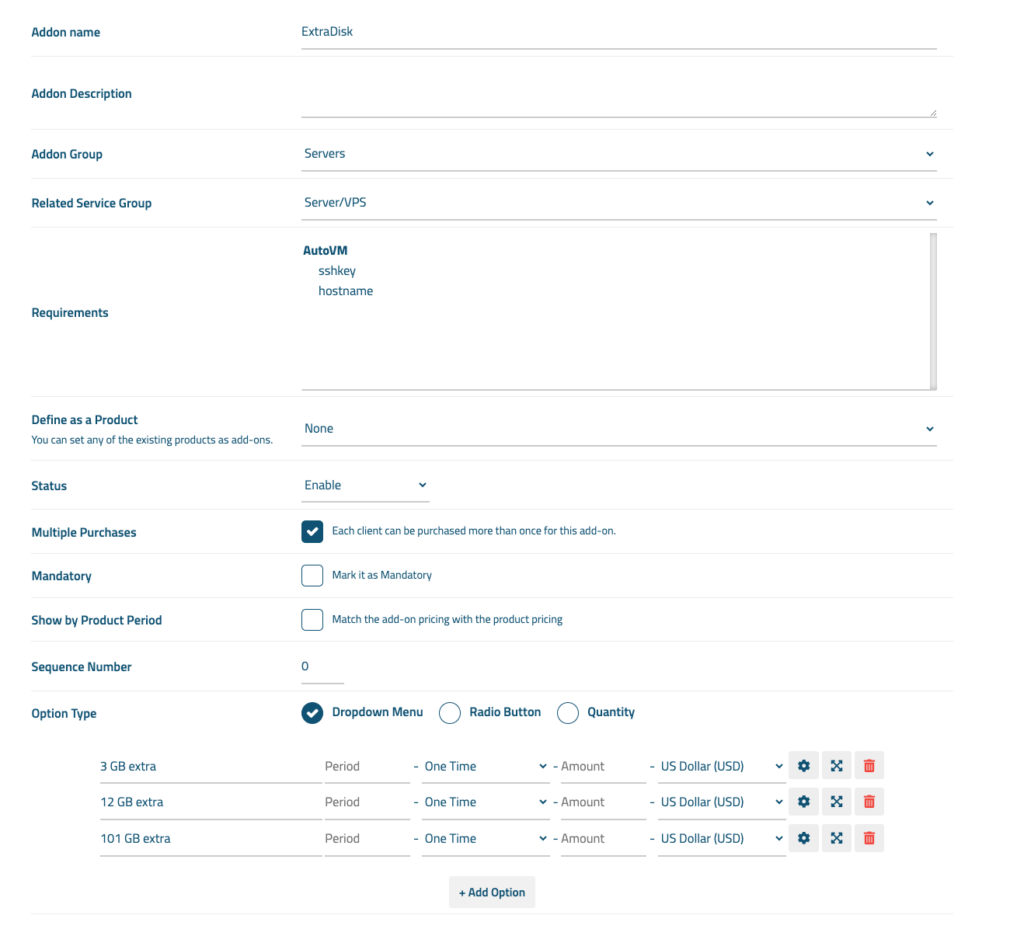
4- ExtraDisk
Addon name —> ExtraDisk
Other parameters like before use same parameters as ExtraMemory, just change the options like this:
- First Option —> 3 GB extra
- Second Option —> 25 GB extra
- Third Option —> 120 GB extra
5- Template *
The case of Template addons is a little bit different as it has no cost in most cases, also it must be written exactly as your templates in backend. You should first check your backend and find templates, then copy their names and use it here, like this:
- First Option —> Debian 11 64
- Second Option —> Ubuntu 18 64
- Third Option —> photon_v4r2
Remember that this addon must be mandatory, not optional
PART TWO: Requirements
For Requirements, we have only two of them, one which is for Hostname that is mandatory and the other for SSH Key which is optional.
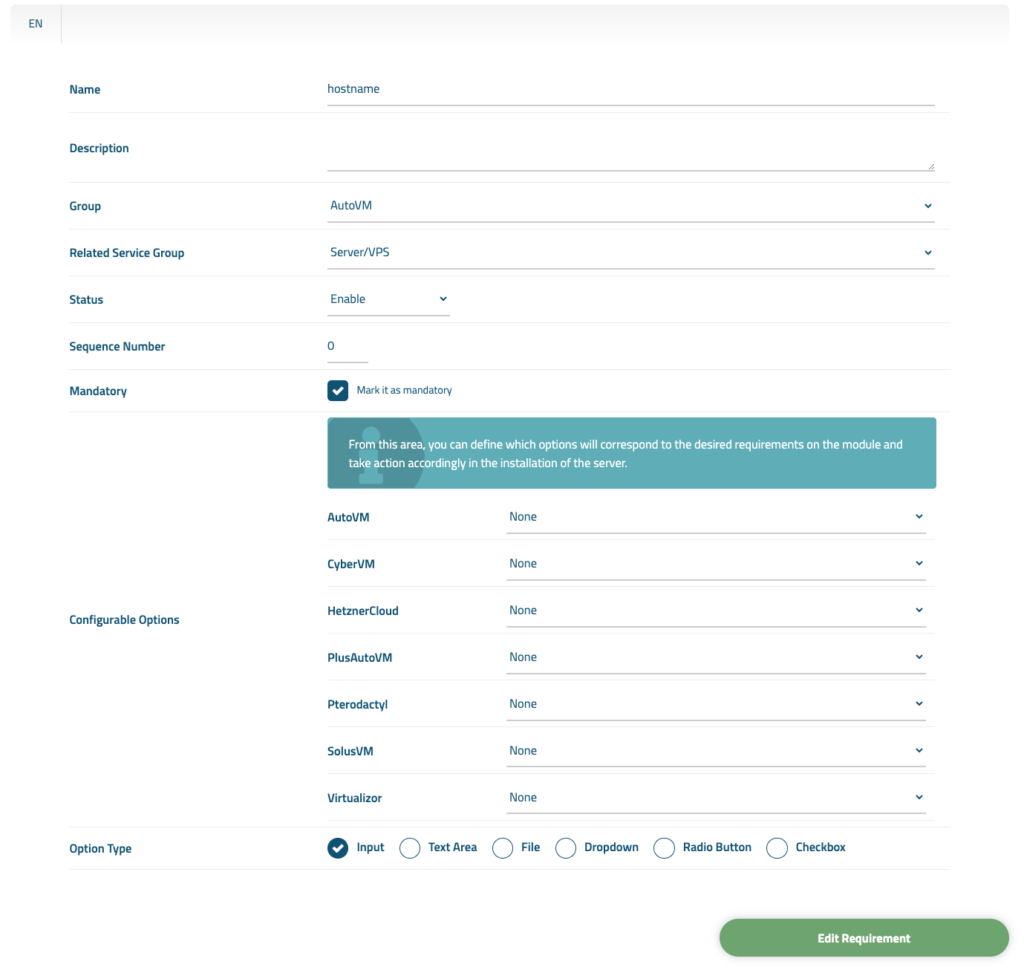
1- Hostname *
As Wisecp has no place to enter the hostname in client side, we must receive the hostname from an input in a Requirement. As you can see in bellow image, it is so simple and you need just create a requirement and use specific character as image. Remember to use lowercase for the name of requirement.
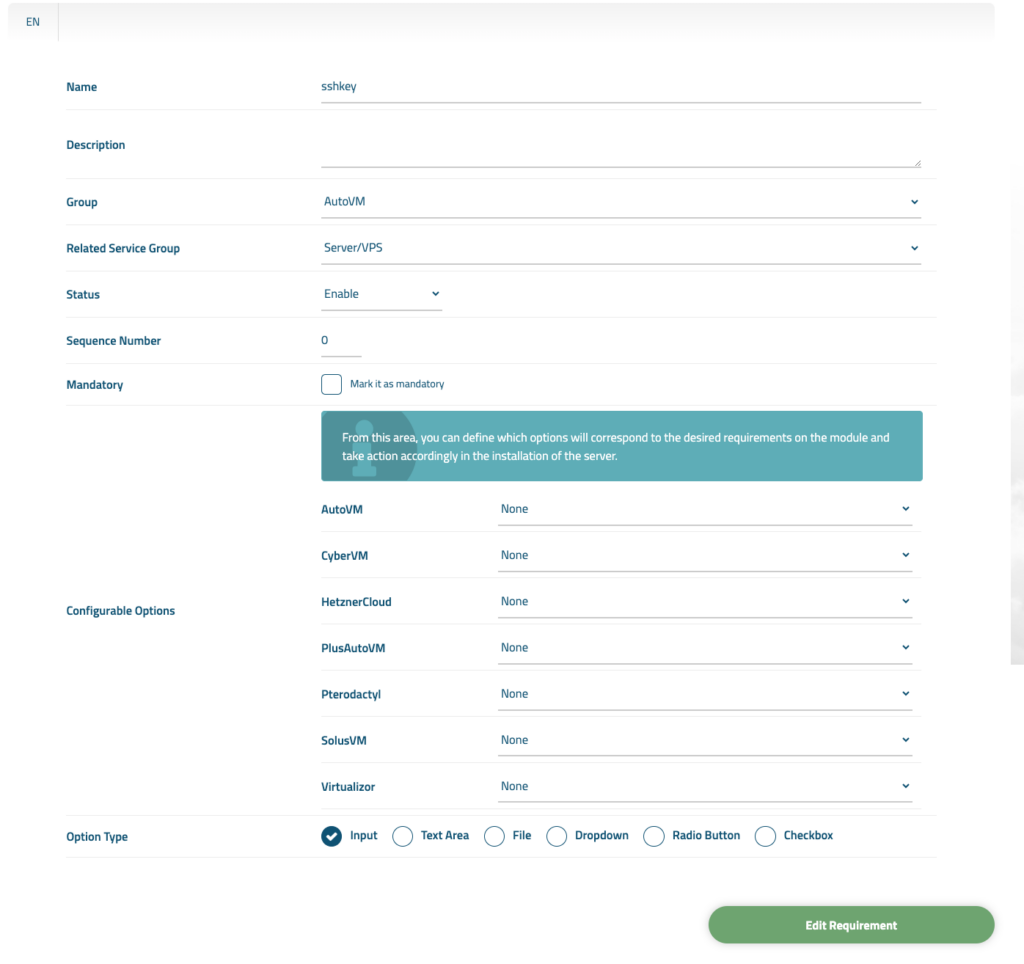
2- SSH Key
Same story for SSH Key as next image, just remember to use “sshkey” as the name of the requirement
STEP 4: Create Requirements
In the Menu bar, go to (Services —> Service Management —> Order Requirements) and click on ( Create New Group) to create a group, input (AutoVM) as the name for this group. After creating this group successfully, then click to edit this group. In the edit page you must add two Requirements, including [sshkey & hostname] to do so, first click on (Add new requirement) button and follow this structure. Remember, you should make your input exactly like this, without changing them to lowercase or uppercase. (Hostname) as Requirements is mandatory but (sshkey) is optional.
A: Hostname Requirements:
- Name —> hostname
- Group —> AutoVM
- Related Service Group —> Server/VPS
- Status —> Enabled
- Mandatory —> Checked, it is Mandatory
- Option Type —> Input
B: sshkey Requirements:
- Name —> sshkey
- Group —> AutoVM
- Related Service Group —> Server/VPS
- Status —> Enabled
- Mandatory —>Unchecked, it is not Mandatory
- Option Type —> Input