13,A- Extra Configurations in WHMCS
Introduction
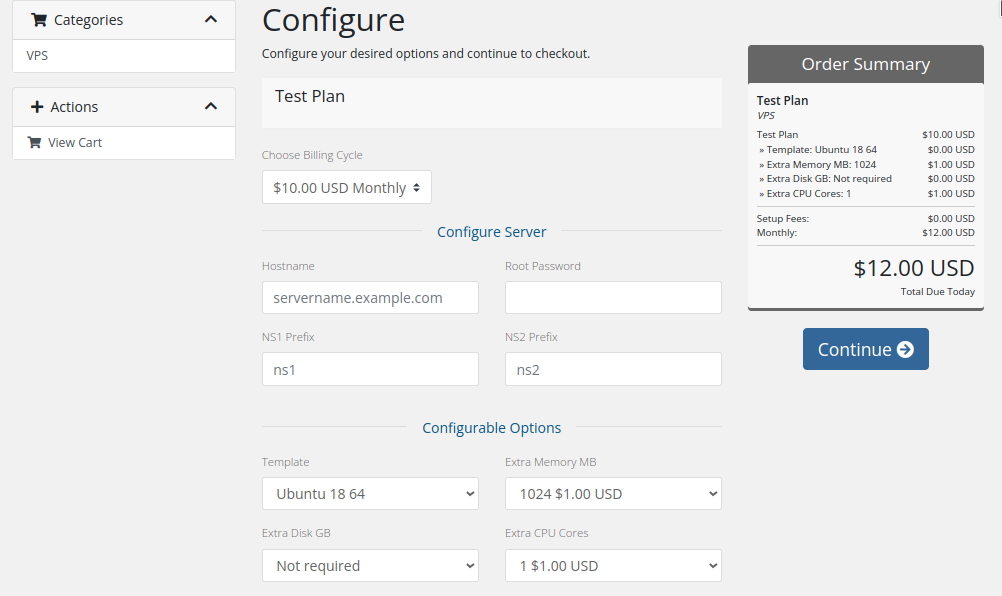
In this tutorial, your customers can add additional resources (extra RAM, CPU, Disk) or additional configuration to their order.
Installation:
Go to WHMCS admin area -> Configurable Options and edit the AutoVM
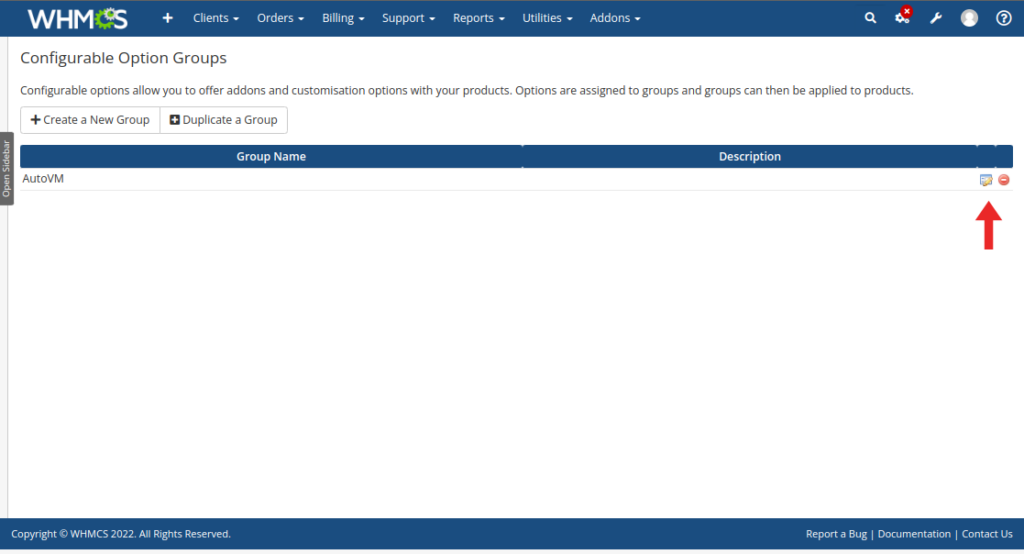
Click on the “Add New Configurable Option” icon.
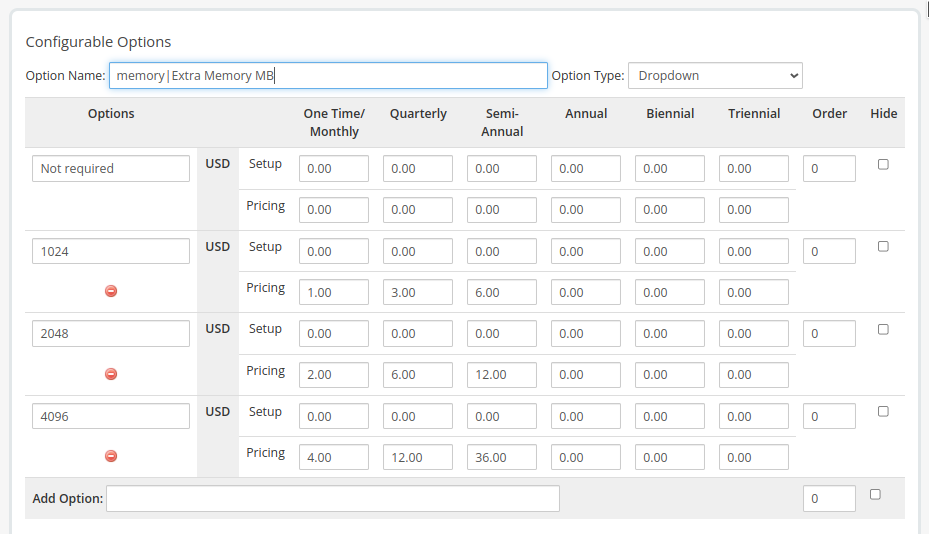
On the option name, enter “memory|Extra Memory MB”
On the first field, enter: “Not required”
follow the other fields like the screenshot
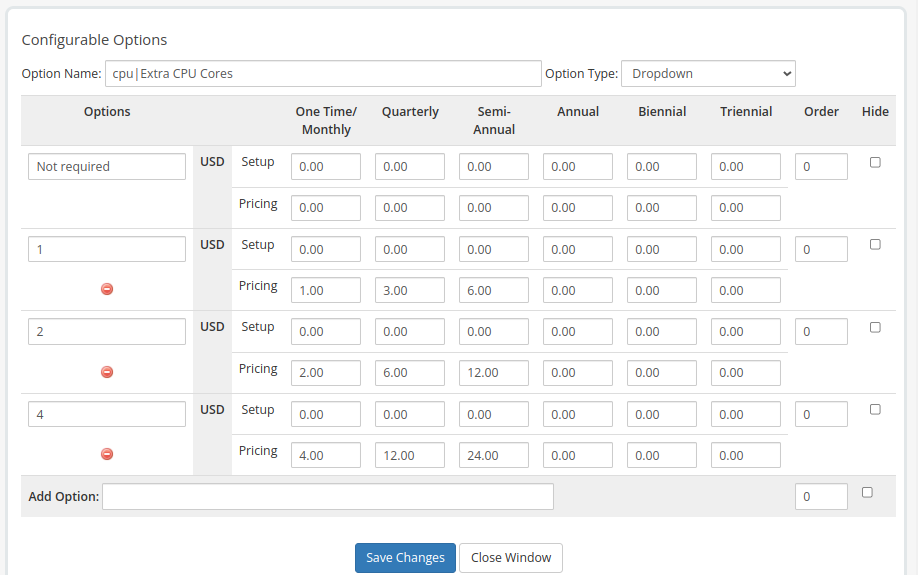
Click on the “Add New Configurable Option” icon again.
On the option name, enter “cpu|Extra CPU cores”
On the first field, enter: “Not required”
follow the other fields like the screenshot:
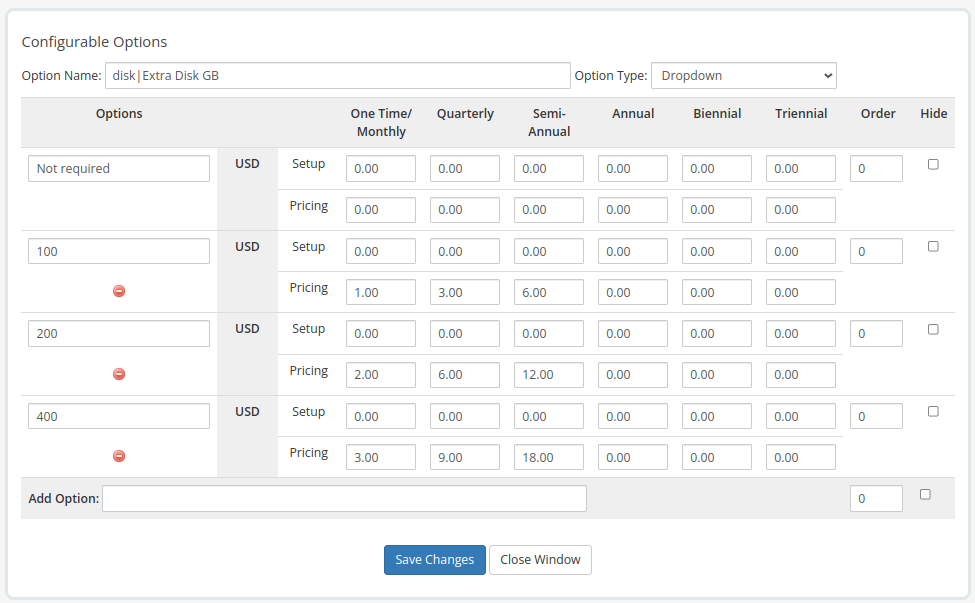
Click on the “Add New Configurable Option” icon again.
On the option name, enter “disk|Extra Disk GB”
On the first field, enter: “Not required”
follow the other fields like the screenshot:
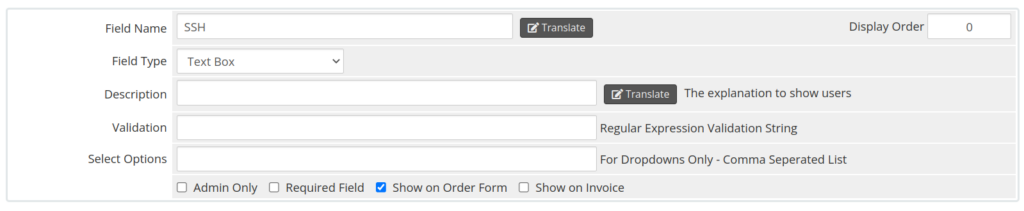
Finally, go to WHMCS > System Settings > Product/Services, edit the product and go to the “Custom Fields” tab and create a new custom field for the SSH KEY with the below information:
Name: SSH
Type: Text
Enable “Show on order form”