
AUTOVM Blog > Weblog > How to upgrade…
How to upgrade ESXi through CLI
By Alireza Mahdavi | 11 July 2022 | 7872 views

Step 1: Enable SSH through the web client and connect to your ESXi host.
Step 2: Enter the following command to enable the firewall rule for web traffic.
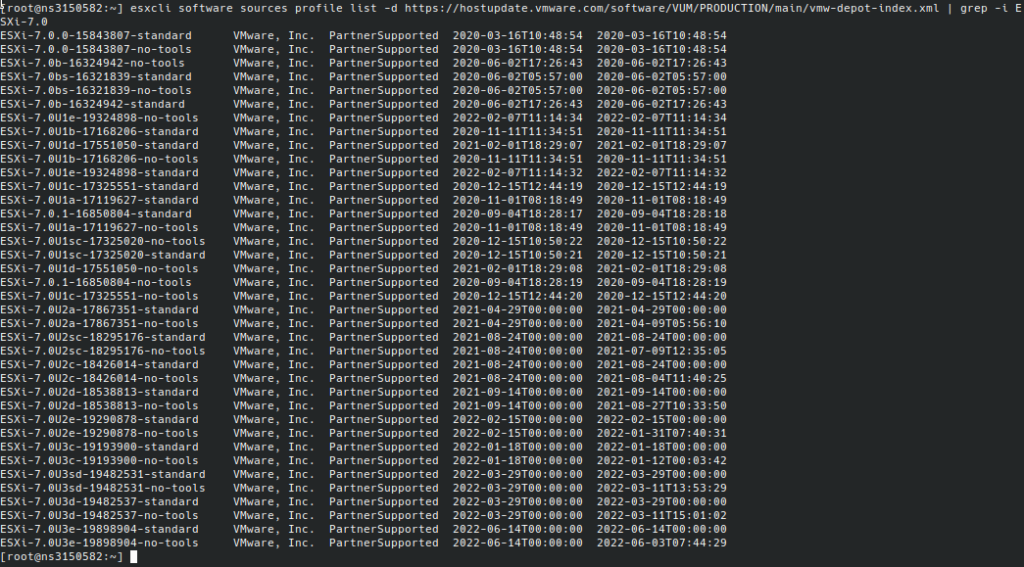
esxcli network firewall ruleset set -e true -r httpClientStep 3: Run this command to see the VMware online depot and the different profiles you can upgrade from.
esxcli software sources profile list -d https://hostupdate.vmware.com/software/VUM/PRODUCTION/main/vmw-depot-index.xml | grep -i ESXi-7.0Note: you can also change ESXi-7.0 to other versions, such as ESXi-6.7, to show the version 6.7 list.
Step 4: Run the upgrade with this command:
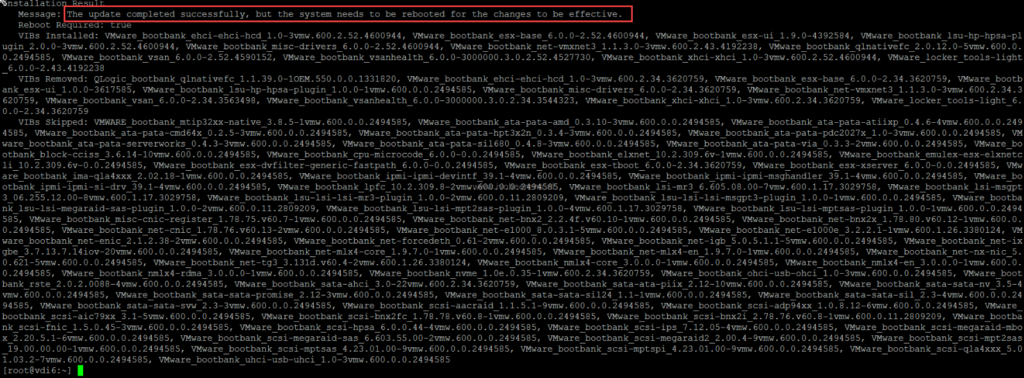
esxcli software profile update -p ESXi-7.0U3e-19898904-standard -d https://hostupdate.vmware.com/software/VUM/PRODUCTION/main/vmw-depot-index.xmlfinally, you’ll see the following output, which requires a reboot to finish the update process.
Before the reboot, enter the following command to disable the firewall for web traffic.
esxcli network firewall ruleset set -e false -r httpClientRelated Blogs
Discover Caasify: A Smarter Way to sell Cloud Services
Why Web Hosting Companies need to join Caasify to Resell Cloud Services As demand for cloud infrastructure continues to grow, web hosting companies are […]
AlmaLinux version 9.1 has been released for the AutoVM platform. Download and deploy OVA templates into your servers through this address. Then go to […]
Subscription for email